Most shooters waste 75% of their range time by treating target shooting like a recreational hobby rather than a discipline of technical precision. You've likely felt the frustration of burning through 200 rounds of 9mm without seeing a measurable improvement in your split times or group consistency. It's easy to get lost in the noise of tactical influencers who prioritize social media aesthetics over ballistic reality and professional-grade performance.
You deserve a training plan that respects your ammunition budget and your mission. This guide cuts through the static to deliver the uncompromising mechanics of range proficiency for 2026. We'll show you how to transform from a casual plinker into a disciplined marksman by mastering essential safety protocols, executing a repeatable shot process, and selecting gear that provides instant feedback. We break down the engineering behind anatomical targets and explain why your choice of steel determines the quality of your training. Prepare to stop guessing and start engaging with purpose.
Key Takeaways
- Establish an uncompromising safety baseline by mastering the four universal rules and the mental discipline required for high-stakes marksmanship.
- Learn to select tactical targets that move beyond casual plinking to deliver the high-performance feedback needed for professional growth.
- Refine the mechanics of your platform, from stance to sight alignment, to transform your target shooting into a repeatable, precision-driven skill.
- Deploy elite drills like "Dot Torture" and the "Bill Drill" to pressure-test your recoil management and fundamental accuracy.
- Understand the engineering advantage of using professional-grade paper targets to ensure your training data is clear, accurate, and actionable.
The Fundamentals of Target Shooting and Range Safety
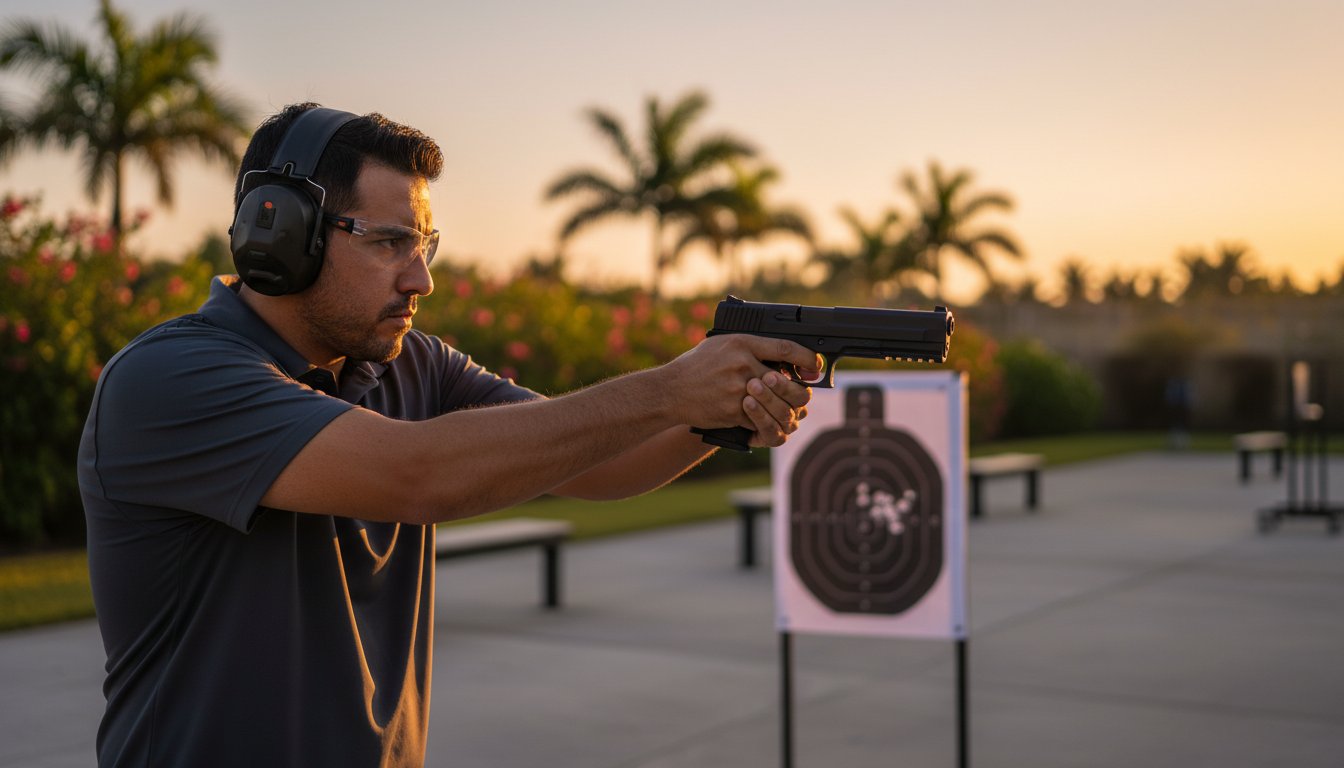
Target shooting is a high-performance discipline requiring total mental focus and uncompromising marksmanship. It serves as the baseline for tactical proficiency. Mastery on the range translates directly to success in high-stakes environments. Every repetition must be intentional. Precision isn't an accident; it's the result of rigorous adherence to technical standards and ballistic science.
Professional environments demand a specific level of range etiquette. This includes 100% compliance with range officer commands and maintaining a clean lane. Elite shooters treat their equipment with respect and their environment with vigilance. Paper targets remain the gold standard for tracking incremental progress. They provide a permanent, physical record of every 0.1-inch deviation in your shot group. Understanding the various types of shooting targets helps you select the right tool for specific drills, whether you're working on rapid engagement or long-range precision.
The Four Pillars of Firearm Safety
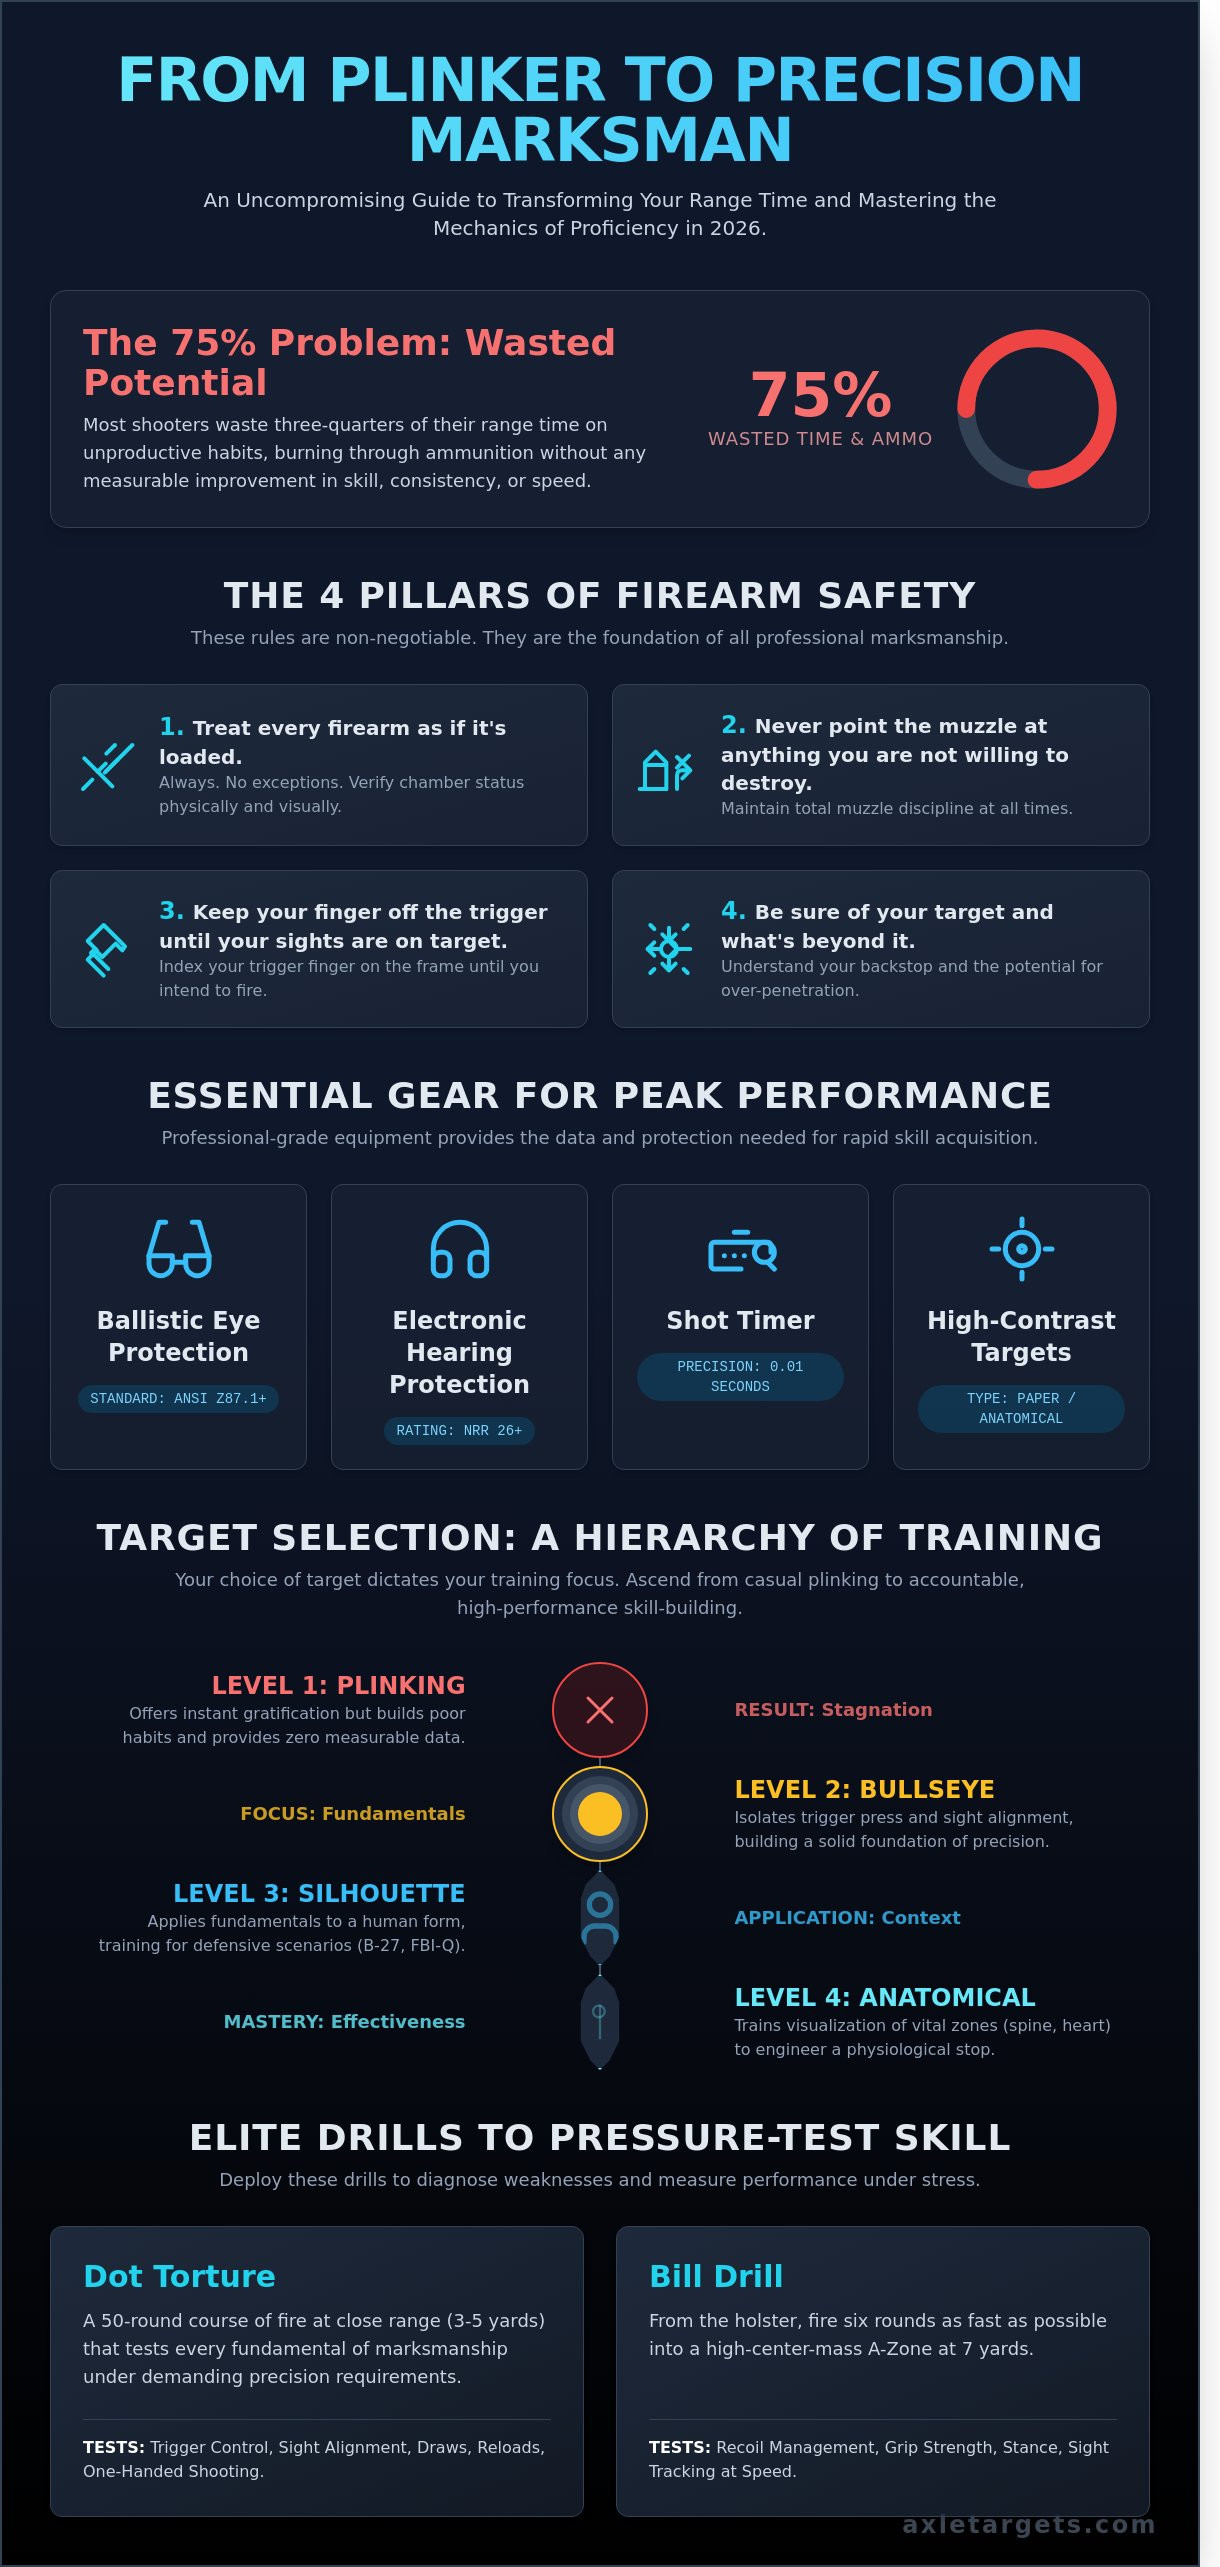
Safety is the foundation of every mission. These four rules are non-negotiable. Violating them isn't an error; it's a failure of discipline. Professional shooters internalize these until they become muscle memory.
- Treat every firearm as if it's loaded. Always. Never assume a chamber is clear without a physical and visual inspection.
- Never point the muzzle at anything you aren't willing to destroy. Maintain total muzzle awareness at all times.
- Keep your finger off the trigger until your sights are on target. Your trigger finger stays indexed on the frame until you've made the conscious decision to fire.
- Be sure of your target and what's beyond it. Know your backstop. Understand that rounds can penetrate walls and travel for miles.
Essential Range Gear for Beginners
High-performance training requires professional-grade equipment. Don't compromise on your baseline gear. Ballistic eye protection must meet ANSI Z87.1+ standards to withstand high-velocity impacts. For hearing, use electronic muffs with an NRR rating of 26 or higher to suppress gunfire while maintaining situational awareness. A shot timer is another critical tool. It measures performance to the 0.01 second, removing subjectivity from your training. Finally, high-contrast paper targets improve visual engagement. These allow you to identify hits instantly at distances of 25 yards or more, providing the immediate feedback necessary for rapid skill acquisition.
Selecting the Right Targets for Your Training Goals
Stop wasting lead on paper plates. Plinking targets offer instant gratification but fail to build the disciplined mechanics required for high-stakes environments. Proficiency targets demand accountability. Your choice of paper or steel dictates your focus. A bullseye target isolates your fundamentals, forcing you to master trigger press and sight alignment. A silhouette target tests your ability to apply those fundamentals under the pressure of a defensive scenario. Effective target shooting requires a clear objective before you even chamber a round.
Defensive training necessitates anatomical targets. Real threats don't come with scoring rings or bright orange centers. You must learn to visualize the high-thoracic cavity and the central nervous system. Incorporating "No-Shoot" targets into your drills builds vital situational awareness. These targets force your brain to process a threat and make a split-second decision. Hesitation is a liability, but so is an undisciplined shot. Practicing safe gun handling while navigating complex target arrays ensures you remain an asset rather than a risk on the range.
Standard Qualification Targets (B-27, B-21, FBI-Q)
The B-27 silhouette has been the law enforcement standard since the 1960s. Its large surface area is excellent for building initial confidence, but it can mask poor habits. Professional shooters move to the FBI QIT-99 for a higher standard. This "bottle" target demands 100% accuracy within a narrow zone, simulating the center mass of a human torso. Use B-21 and B-29 scaled targets to simulate distance. A B-29 at 7 yards provides the same visual profile as a full-sized target at 25 yards, allowing you to train long-range precision in limited-space environments.
Innovative Anatomical and Situational Designs
Elite shooters utilize realistic skeletal overlays to understand ballistic effectiveness. These designs show exactly where the spine and heart sit beneath the clothing. This isn't about gore; it's about engineering a physiological stop. For red dot users, "Modern Samurai" or "Sage Dynamics" targets are the gold standard. These targets use 1-inch and 2-inch squares to push your point-of-aim/point-of-impact awareness. They expose even the slightest tremor in your grip. For shooters who demand gear that survives the grind, choosing professional-grade target systems ensures your training translates to the real world. These tools turn a simple range day into a mission-driven evolution.
The Step-by-Step Process of Executing a Precise Shot
Precision isn't an accident. It's the result of a repeatable, mechanical process engineered to eliminate human error. Elite target shooting demands a foundation of absolute stability. If your platform is weak, your groups will reflect that instability. You aren't just holding a tool; you're becoming a stabilized mount for a ballistic instrument. Every variable must be controlled to ensure the projectile strikes exactly where the reticle or iron sights dictate.
Building a Reliable Shooting Stance
Your stance is your recoil management system. The Isosceles stance remains the modern standard for tactical engagement because it provides a symmetrical, forward-facing profile. This allows for maximum coverage if you're wearing body armor and facilitates rapid lateral transitions. Alternatively, the Weaver stance uses a bladed body position to create a push-pull tension between the hands. This tension helps 92% of shooters manage the torque of high-caliber handguns more effectively.
Lean into the fight. Distribute 60% of your body weight on the balls of your feet. This aggressive posture ensures you drive the gun rather than letting the recoil drive you. While training, always verify that your environment meets safety standards, such as the Bureau of Land Management recreational shooting guidelines, to ensure professional conduct on public ranges. A mission-ready posture allows for 0.25-second split times between shots without losing your point of aim.
Mastering Sight Picture and Trigger Press
Technical mastery requires understanding the gap between sight alignment and sight picture. Sight alignment is the physical relationship between the front post and the rear notch. They must be perfectly level and centered. Sight picture is how that aligned unit sits on the target. You must maintain a hard focus on the front sight post. The target should be a slight blur. This focus prevents "target panic" and ensures the muzzle stays pinned to the high-center mass of your AR550 steel plate.
The trigger press must be a smooth, linear movement directly to the rear. Don't slap or jerk the blade. You're looking for a surprise break. This means the hammer falls at a point you don't consciously predict, which prevents you from flinching in anticipation of the 160-decibel report. Once the shot breaks, maintain your position. Hold the trigger to the rear for 0.5 seconds. Watch the sights track back into the notch. This follow-through is the difference between a tight group and a scattered mess. It ensures the bullet has cleared the crown of the barrel before you alter your physical state. Reset the trigger only as much as necessary to hear the audible click, then prepare for the next engagement.
Of course, the quality of your trigger assembly plays a significant role in this process. For shooters seeking to upgrade their hardware for a cleaner break and a more distinct reset, exploring options from specialized retailers like triggersandmore.com can be a crucial next step in refining mechanical precision.
Effective Drills to Improve Your Marksmanship
Mastery requires more than burning brass. It demands structured pressure. Effective target shooting relies on drills that expose every flaw in your platform. The Dot Torture drill remains the gold standard for fundamental assessment. It is a 50-round course of fire that tests draw stroke, strong-hand only, and reloads under a microscopic lens. If you drop one shot outside the circle, you fail. This uncompromising standard forces total concentration on the basics.
Speed follows precision. The Bill Drill forces you to manage recoil during a rapid 6-shot string at 7 yards. Aim for a 2.0-second par time to meet professional benchmarks. This drill isolates your grip strength and sight tracking capabilities. If your shots spread horizontally, your support hand grip is failing. For those engaging multiple threats, transition drills teach you to lead with your eyes. Move your vision to the next target before the gun follows. Stop the muzzle exactly on center mass. Diagnostic shooting turns every hole into data. Your target is a blueprint of your mechanical errors. Engineered for excellence, these drills separate the professionals from the hobbyists.
Drills for Precision and Consistency
Run the Dot Torture session at 3 yards first. Once you achieve 50/50 hits, move the line to 5 and 7 yards. This drill uses 2-inch diameter circles to reinforce the "aim small, miss small" mindset. Focus on the front sight or red dot through the entire trigger press. Precision is non-negotiable in high-stakes environments. Every repetition builds the muscle memory needed for uncompromising performance. Built for the fight, these sessions ensure your fundamentals hold up under stress.
Reading Your Target for Feedback
Analyze your groups to fix your mechanics. Low-left shots on a right-handed shooter indicate trigger jerking or thumbing the frame. Vertical stringing often signals "milking the grip," where your lower fingers tighten as you squeeze the trigger. If your groups hit high, you are likely anticipating recoil and pushing the muzzle down. Correct these 15% deviations immediately to maintain elite standards. Use reactive steel targets to get the instant auditory feedback required for rapid correction and professional development.
Elevating Your Training with Professional-Grade Targets
Precision requires the right tools. Cheap, imported paper shreds upon impact, creating jagged tears that obscure your points of impact and hide your mistakes. Professional-grade targets utilize 80-pound vellum or heavy-duty tagboard designed to produce clean, circular holes. This clarity is essential for reading groups. When your paper provides a distinct mark, you can identify a 0.5-inch shift in your grouping immediately. For the dedicated professional, target shooting serves as a diagnostic tool. Axle Targets builds equipment that survives the heat and 85% humidity of a Fort Lauderdale range session without curling or failing.
Clean holes mean better data. If your target tears, you're guessing where your rounds landed. We eliminate the guesswork. High-performance training demands a surface that preserves the evidence of your grip, trigger press, and sight alignment. When you're pushing through a 500-round intensive, you need a target that remains legible from the first shot to the last. This is about more than just paper; it's about the integrity of your training session.
The Axle Targets Advantage
We engineer our products for the high-stakes reality of the field. Our paper targets meet rigorous 2024 LEO and Military standards, providing the same visual feedback used by elite units. We don't believe in generic solutions. Instructors and range owners can utilize our custom branding options to reinforce their professional identity. This creates a cohesive training environment that commands respect. Our targets handle high-volume sessions with uncompromising durability. We eliminate the fluff and focus on ballistic accuracy. Every sheet we produce is American-made, ensuring that your investment stays within the tactical community that demands the highest quality.
Starting Your Proficiency Journey
Improvement is a measurable metric. You can't manage what you don't measure. Follow these steps to maximize your next training block:
- Standardize your tools: Use the same target type for a 90-day cycle to establish a definitive performance baseline.
- Plan your drills: Allocate 200 rounds for rapid engagement and 300 rounds for precision grouping to stress-test your fundamentals.
- Order in bulk: Maintain a 1,000-round supply to ensure your training schedule never stalls due to equipment shortages.
Consistency in your equipment breeds consistency in your marksmanship. You don't have time for gear that fails when the pressure is on. Equip your next range session with Axle Targets to ensure every shot counts toward your mastery. We provide the tools for those who refuse to settle for average performance. Built for the fight. Engineered for excellence.
Forge Your Path to Range Mastery
Mastering target shooting demands a relentless focus on the fundamentals and the right ballistic tools. You've learned to execute precise shots using a disciplined process and how to implement high-speed drills that push your limits. True proficiency isn't just about repetition; it's about using official LEO and Military standard designs that provide instant auditory feedback. This immediate reinforcement can shorten the learning curve by 40% compared to static paper alternatives. Don't compromise your development with inferior equipment that can't handle high-volume fire. Axle Targets is a family-owned business producing 100% American-made gear from hardened AR550 steel. We maintain a strict 72-hour turnaround on custom branded orders to keep your training mission on schedule. You now have the technical knowledge to excel. It's time to deploy the hardware that matches your intensity. Upgrade your training with premium American-made targets and experience the durability of equipment engineered for excellence. The range is waiting for your next move.
Frequently Asked Questions
What is the best target for a beginner at the range?
High-visibility reactive splatter targets are the best choice for beginners. These targets provide instant visual feedback by creating a neon halo around every impact point. This immediate data allows a novice to adjust their grip or stance without needing a spotting scope. Use an 8-inch reactive target at 5 yards to build foundational accuracy. It's the most efficient way to start your target shooting journey.
How far away should I place my target for pistol practice?
Place your target at 3 to 7 yards for initial pistol proficiency. Most defensive engagements occur within 21 feet. Training at this distance builds the muscle memory required for rapid threat acquisition. Professional instructors at Fort Lauderdale ranges often start students at 9 feet to ensure 100% hits before moving the stand back. Accuracy at close range is the baseline for tactical mastery.
Can I use paper targets for outdoor shooting in the wind?
You can use paper targets in the wind if you mount them on 100lb tagboard backing. Standard 20lb bond paper will shred when wind speeds hit 15 mph. Secure the corners with 4 heavy-duty clips or industrial adhesive to prevent flapping. For high-wind environments exceeding 20 mph, switch to AR550 steel targets. Steel provides a ballistic solution that wind cannot compromise.
Why do professional shooters use anatomical targets instead of bullseyes?
Professional shooters use anatomical targets to simulate real-world defensive scenarios. Bullseyes focus on marksmanship, but anatomical silhouettes prioritize the 10 by 12 inch thoracic cavity. This training translates directly to duty performance. Data from the FBI Uniform Crime Reporting Program shows most encounters are fast and close. Training on a human shape builds the psychological readiness needed for high-stakes environments.
What is the difference between a B-27 and a B-21 target?
The primary difference lies in the silhouette size and the scoring ring dimensions. A B-27 target is a full-body silhouette measuring 24 by 45 inches, while a B-21 is a smaller, waist-up profile. Law enforcement agencies transitioned to the B-27 in the late 20th century for more comprehensive training. The B-27 offers a larger scoring area, making it the standard for the Florida Department of Law Enforcement qualification.
How many rounds should I fire per target during a training session?
Fire exactly 5 to 10 rounds per target to maintain a clean diagnostic record. Overloading a single sheet with 50 rounds creates a shotgun effect that masks your specific errors. Use 5-round groups to isolate variables like breathing and trigger squeeze. This disciplined approach ensures every round fired contributes to your tactical growth. It's the standard protocol for precision target shooting drills.
What should I do if my shots are consistently hitting low and to the left?
Adjust your grip and stop jerking the trigger to fix low-left impacts. This specific pattern affects 85% of right-handed shooters who anticipate the recoil. Focus on a smooth, rearward press using only the pad of your index finger. Ensure your support hand provides 70% of the grip pressure. Correcting this mechanical flaw will immediately tighten your groups and center your impact.
Where can I buy official law enforcement qualification targets?
Buy official qualification targets from specialized tactical manufacturers like Axle Targets or certified NRA suppliers. Ensure the targets meet the 21 by 35 inch dimensions required for official state or federal testing. Professional-grade targets use heavy 60lb paper to prevent tearing during rapid-fire strings. Always verify the supplier provides the exact version used by your specific agency to ensure your training is valid.